I got a new toy (RasPi 5) for Christmas and want to start playing with it :)) In the spirit of FOSS and FOSH, here are some details and pics of a new build.
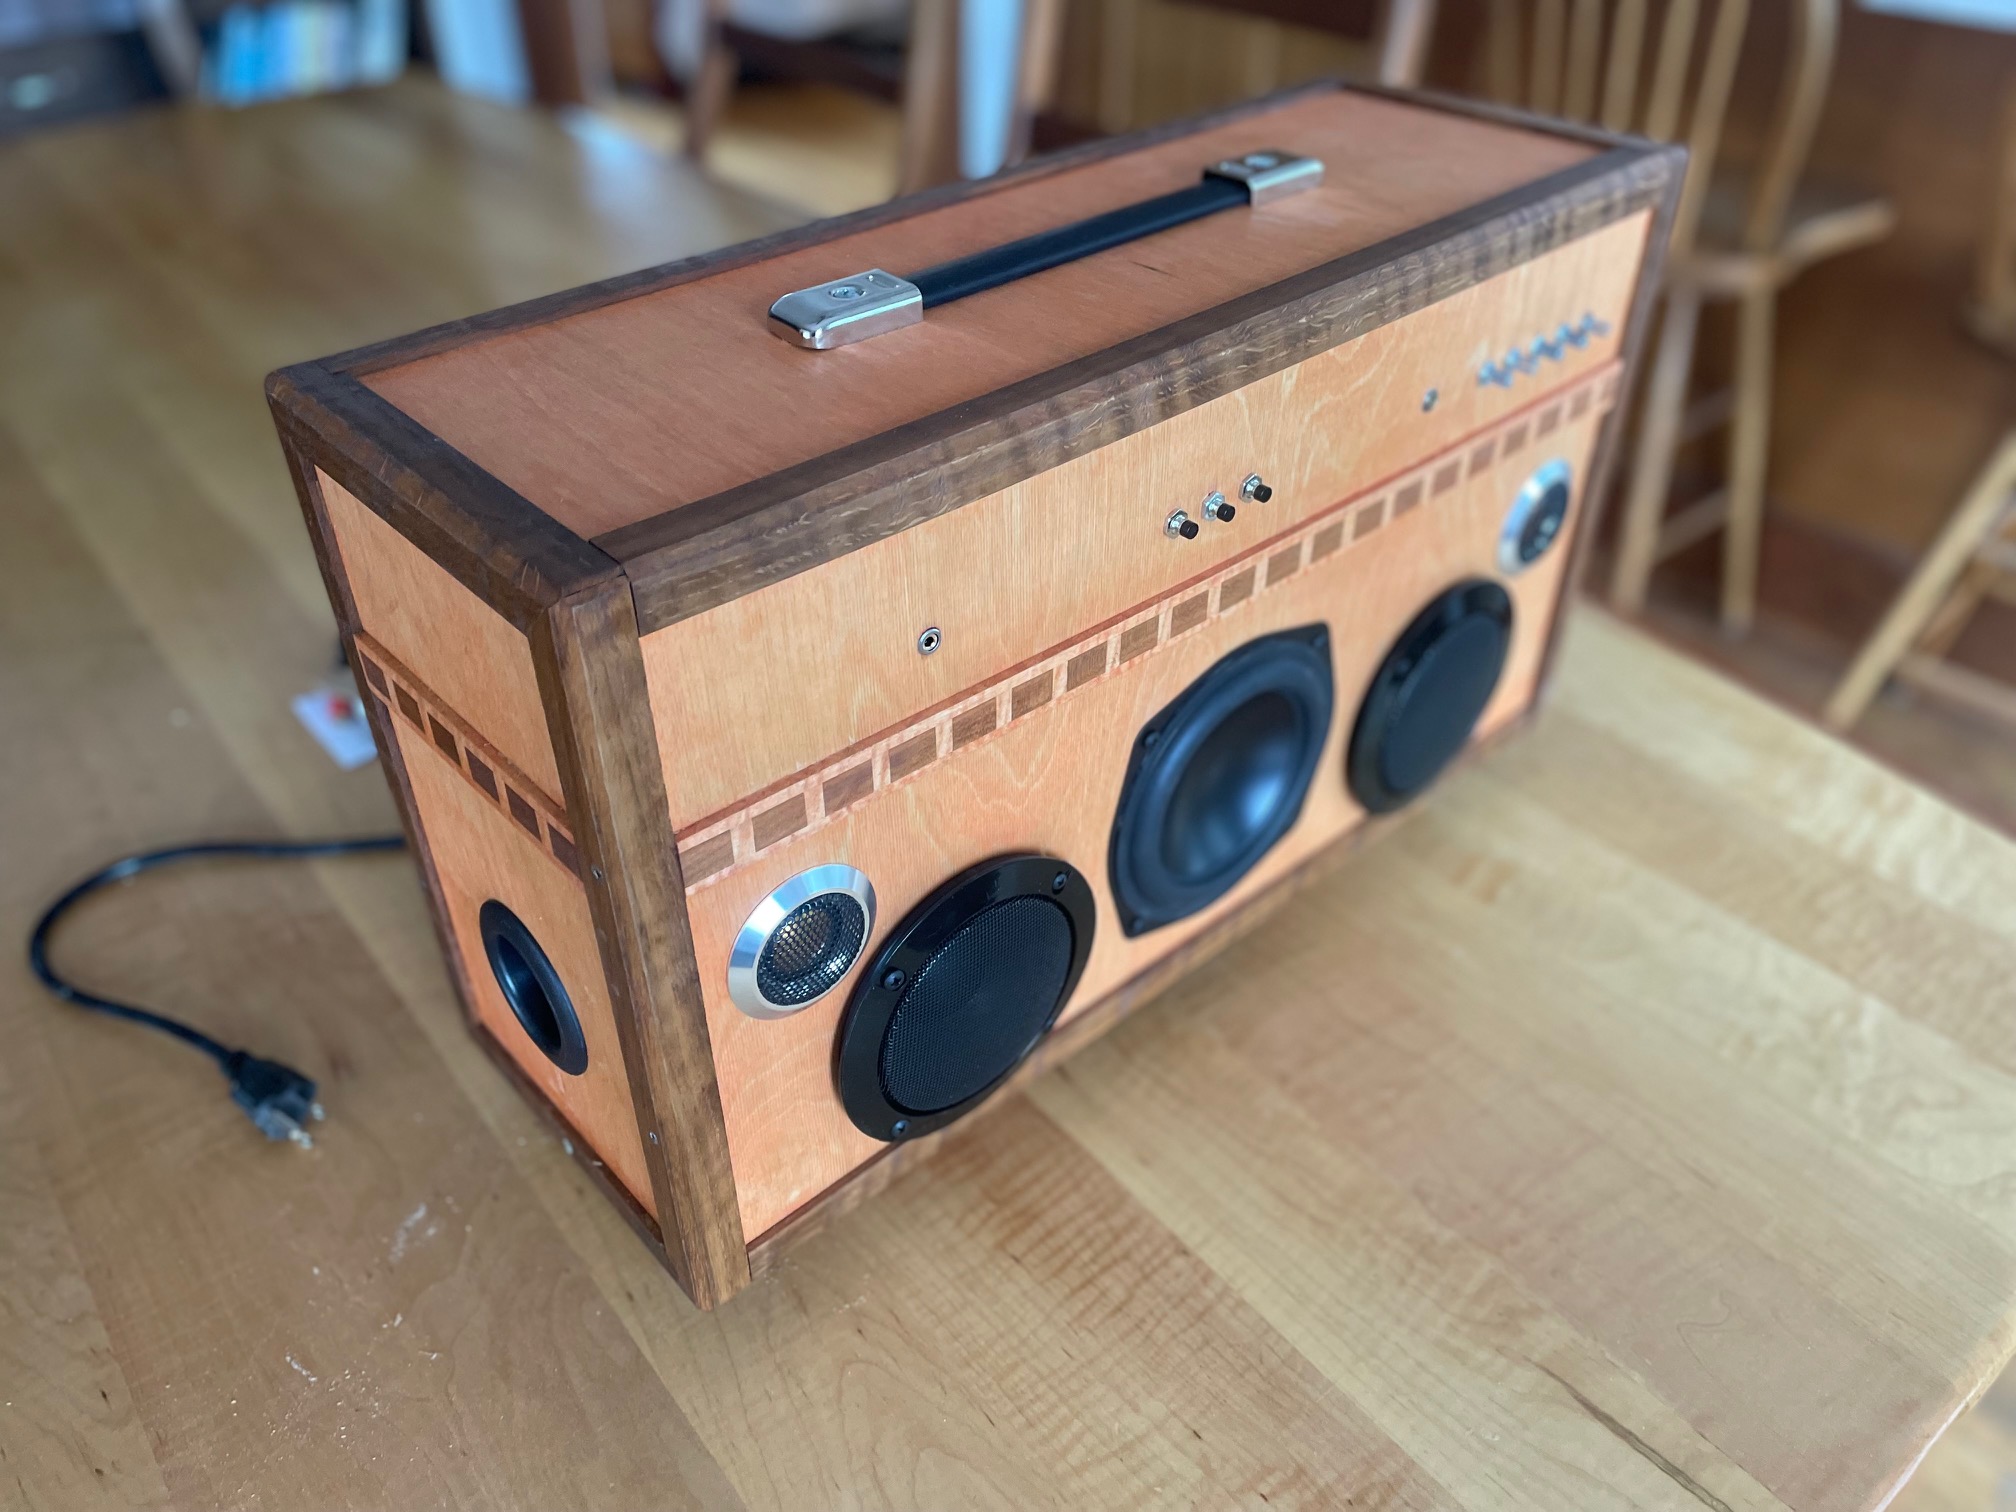
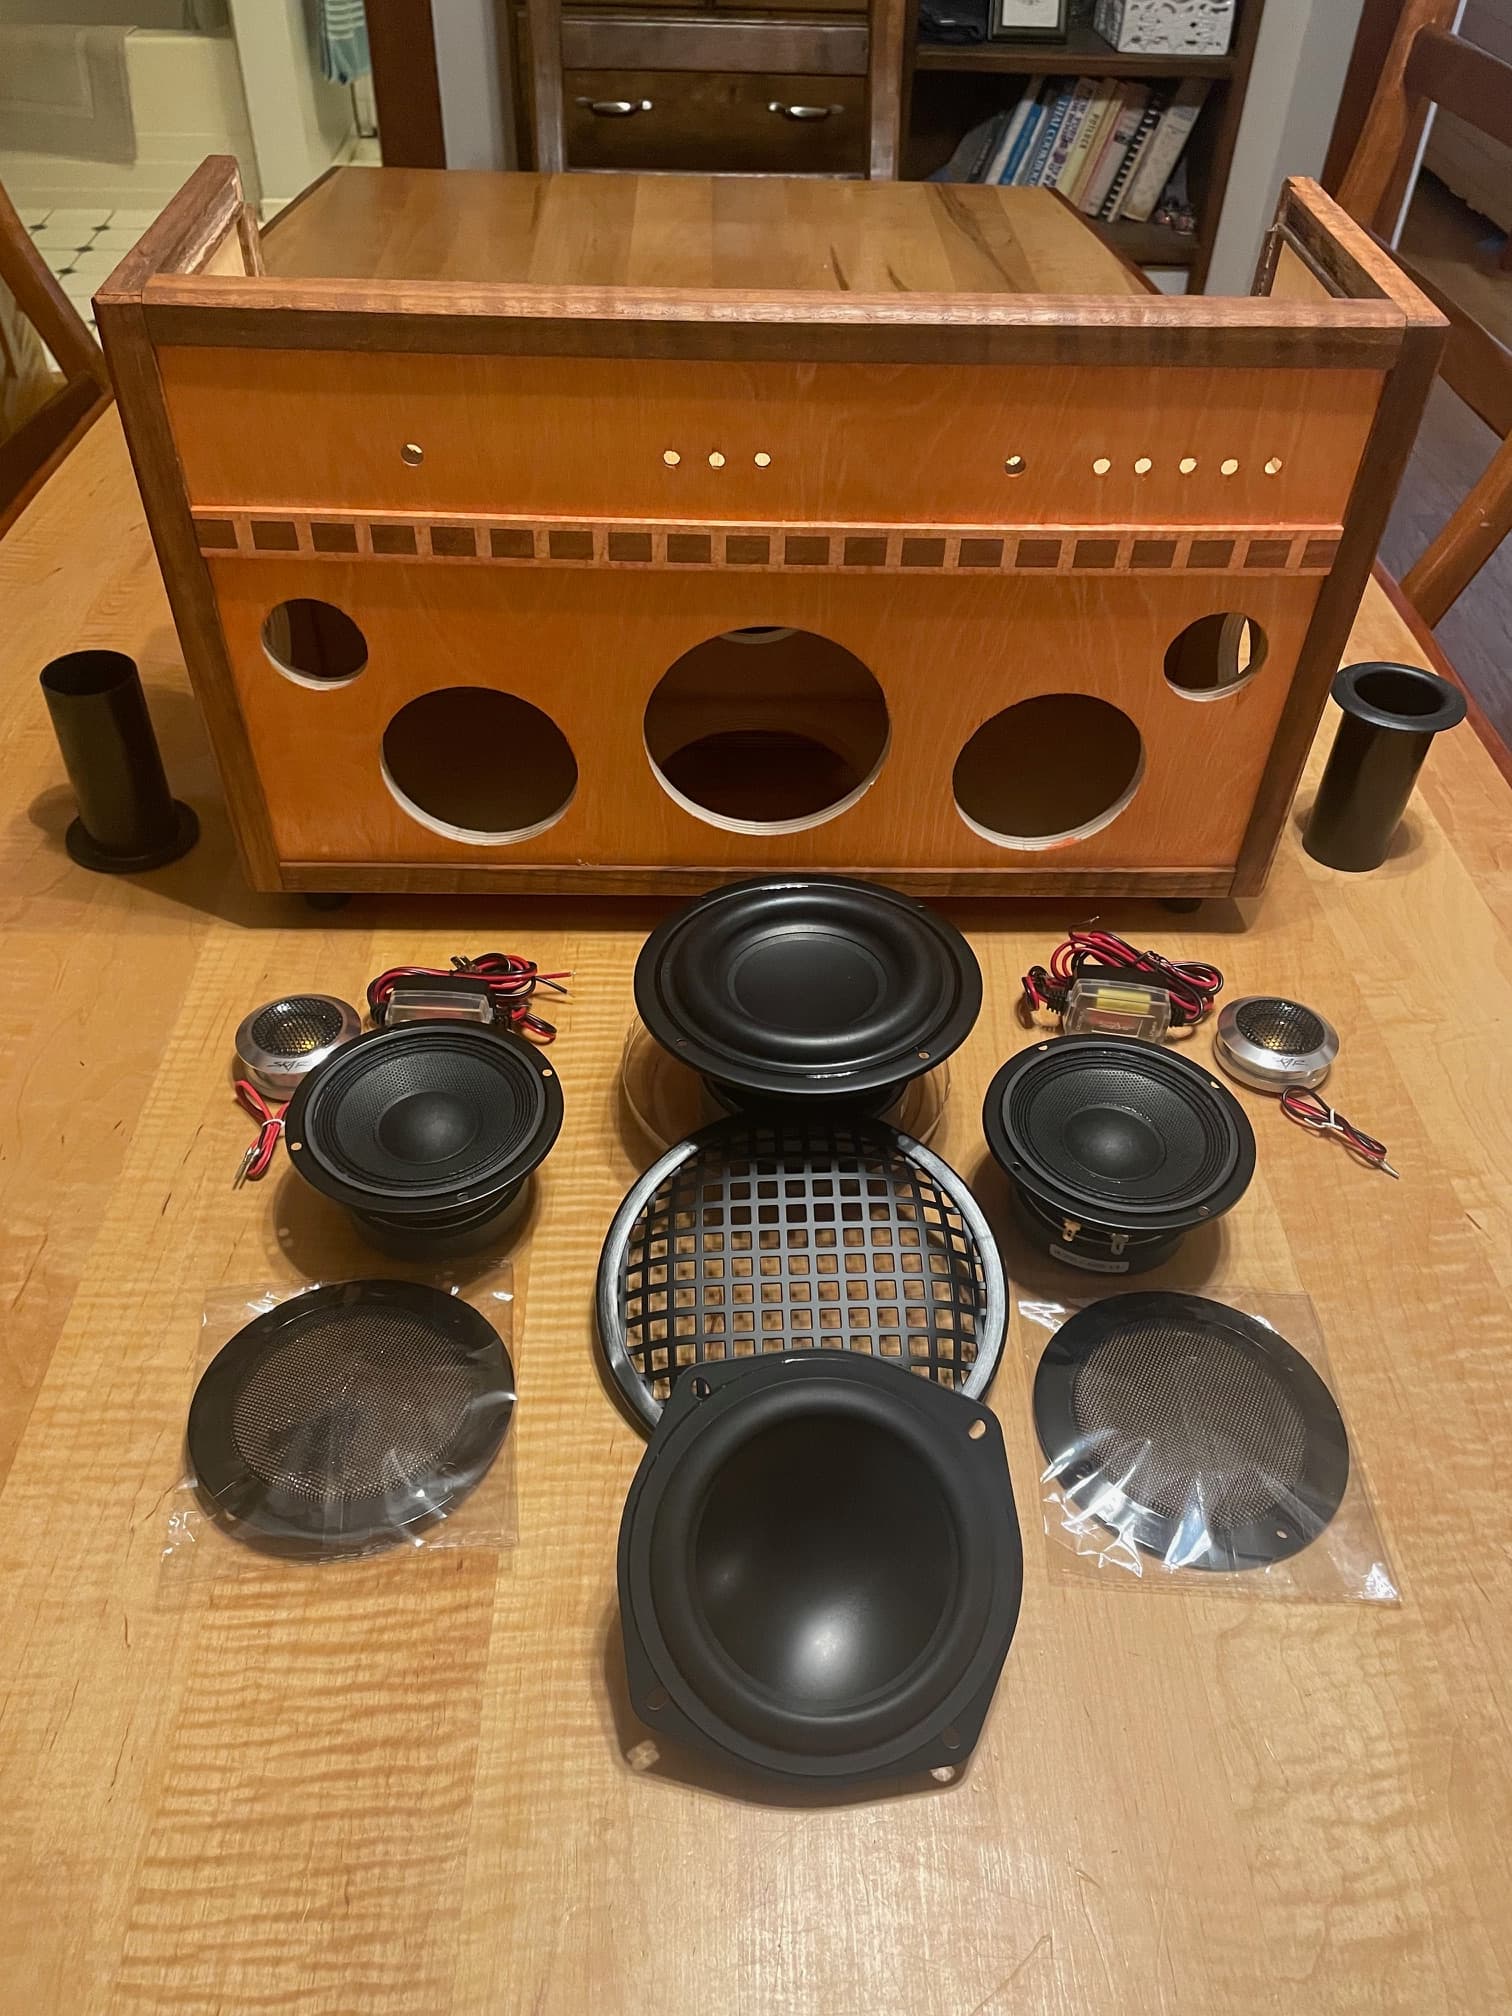
The picture of the front shows the “carcass” which has three enclosures below for the left, right and subwoofer, and the space above for the amp, computer and other components. Two removable panels allow easy access to the components. It’s constructed of 1/2" Baltic birch plywood with some rare curly oak for the edge moldings. The decorative molding in the front is curly maple and cherry. The subwoofer is “down firing” while the other 5-1/4" device in front is a “passive radiator” - a speaker with no electronics. There is also a smaller passive radiator on the back, so the subwoofer is effectively driving three “speakers”. The left and right enclosures get 4" mid-range and 1" tweeters. “Crossover networks” come with the tweeters, so no soldering required. The tweeters really do bring out the highs when compared with “full range drivers”, and of course, the subwoofer and friends really bring out the lows. There will be a 3.5mm headphone jack on the left, and an “aux in” on the right. The left and right enclosures are ported with 1-3/4" ports seen on the sides. The sub and mid-ranges are protected with grills, while the passive radiators are unprotected because they’re the cheapest to replace and look kinda cool naked.
For a finish, previously clear stain was used, but Baltic birch has little grain and color, and it just seemed too plain. Tried an orange stain, but it was too bright and gaudy. Mixing the stain with about four parts water turned it into an “orange-wash”, which adds color, brings out the grain, but is not overwhelming. Want to try a “red-wash” next. After the stain a coat of “the mixture” is applied and again wiped off. It is one part polyurethane, one part boiled linseed oil and one part turpentine.
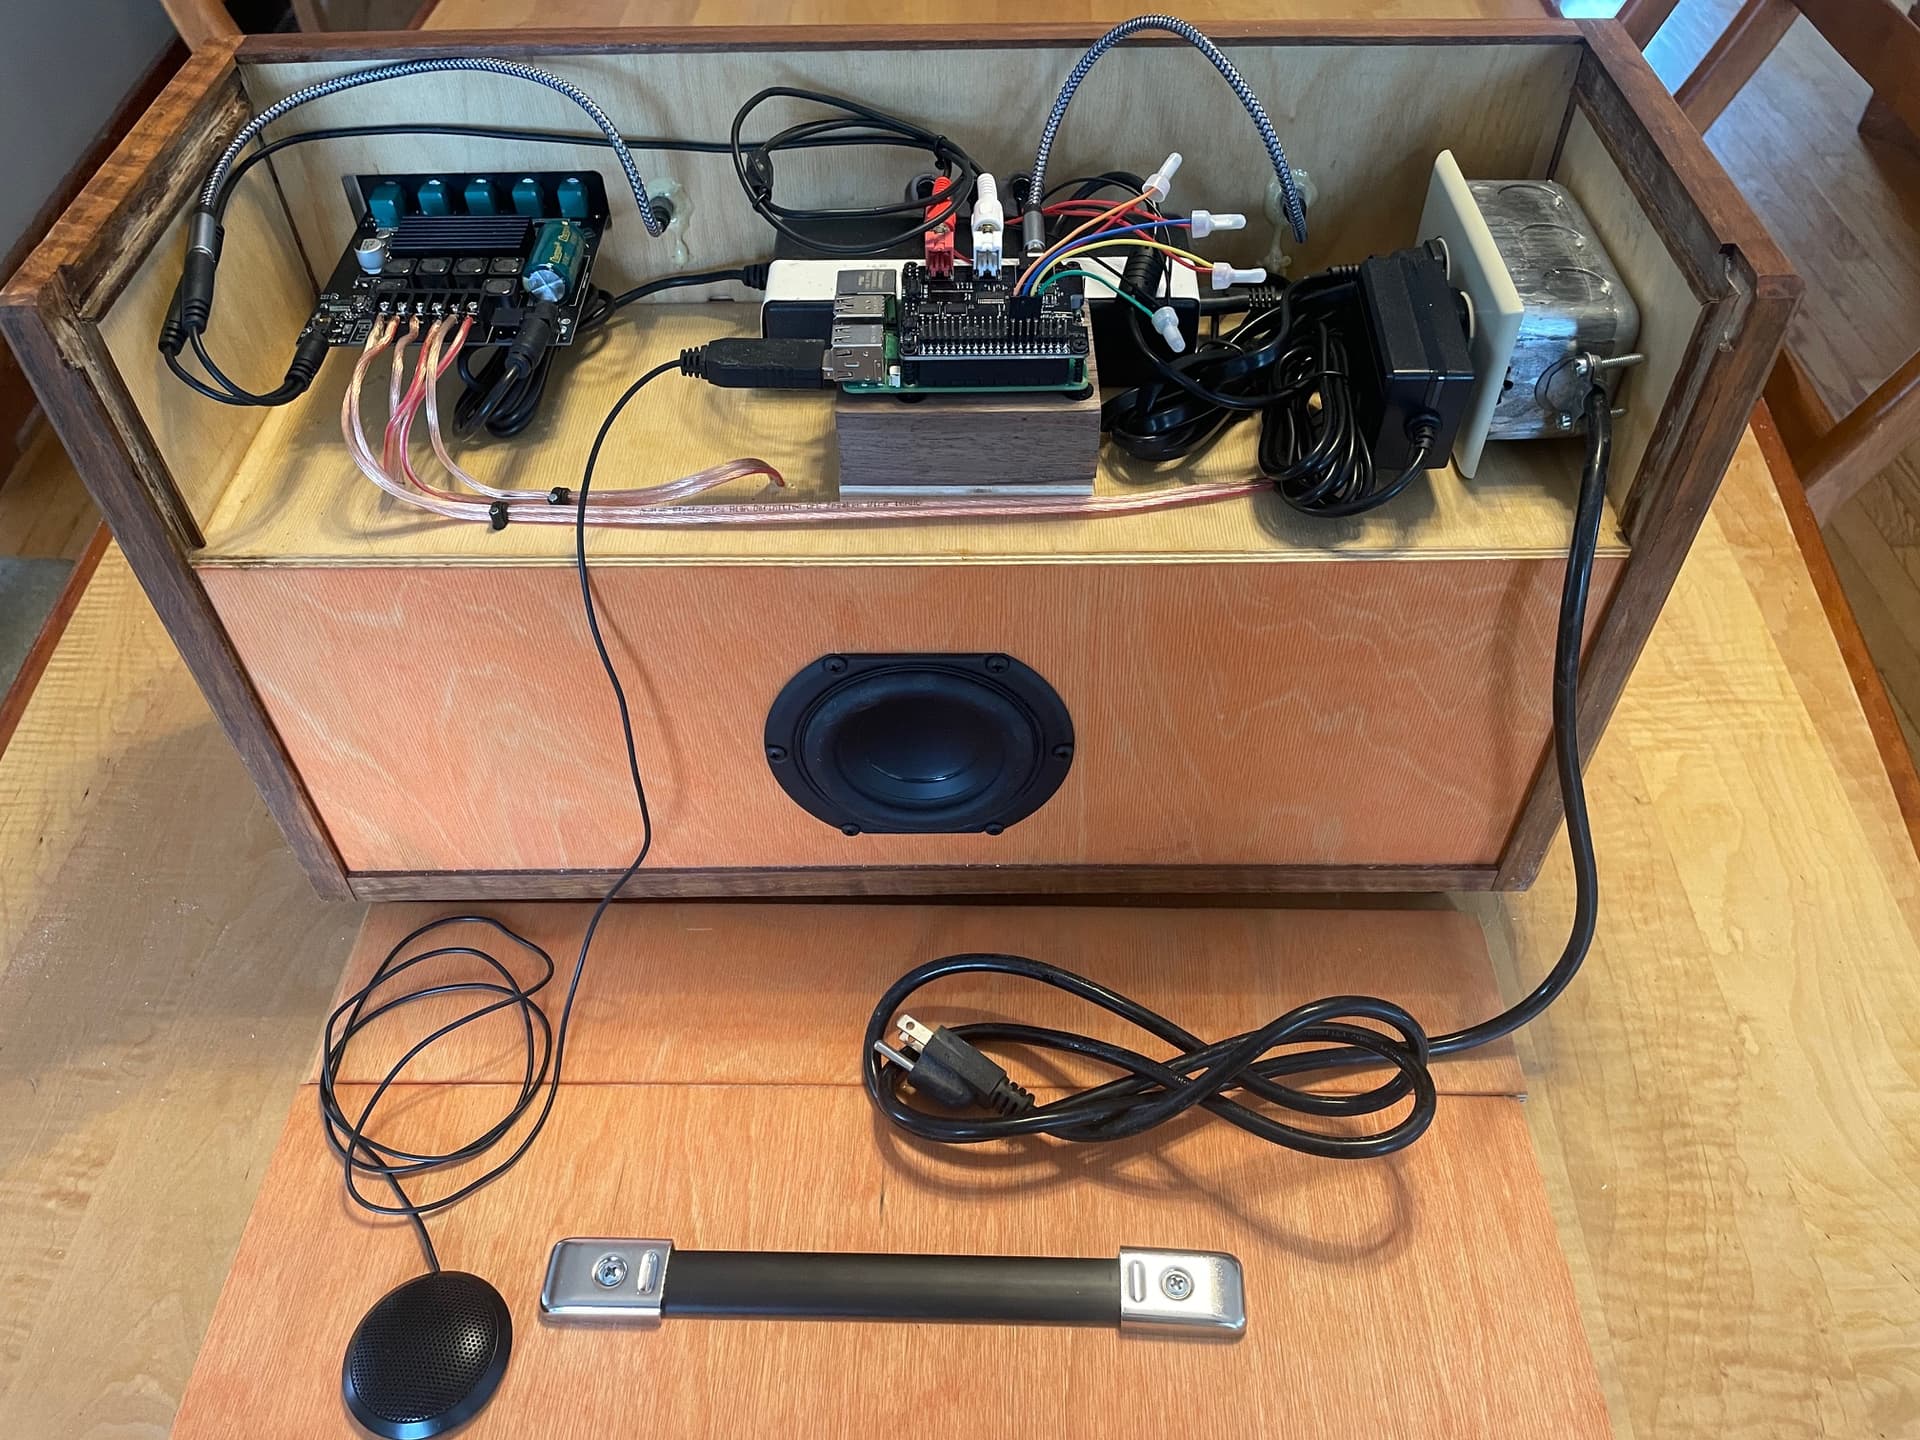
The picture of the back shows an amp on the left, a RasPi 5 and a Hifiberry “DAC HAT” to greatly improve the audio. Two power supplies are needed: 24V for the amp and 5V for the computer; thus the need for an electrical outlet. On the left is a USB microphone. In the center are three pushbuttons for previous track, stop/pause, and next track. The amp has an on/off/volume control on the right, treble and bass controls in the middle, and subwoofer volume and cutoff frequency on the left. You can Bluetooth directly to the amp and bypass the computer.
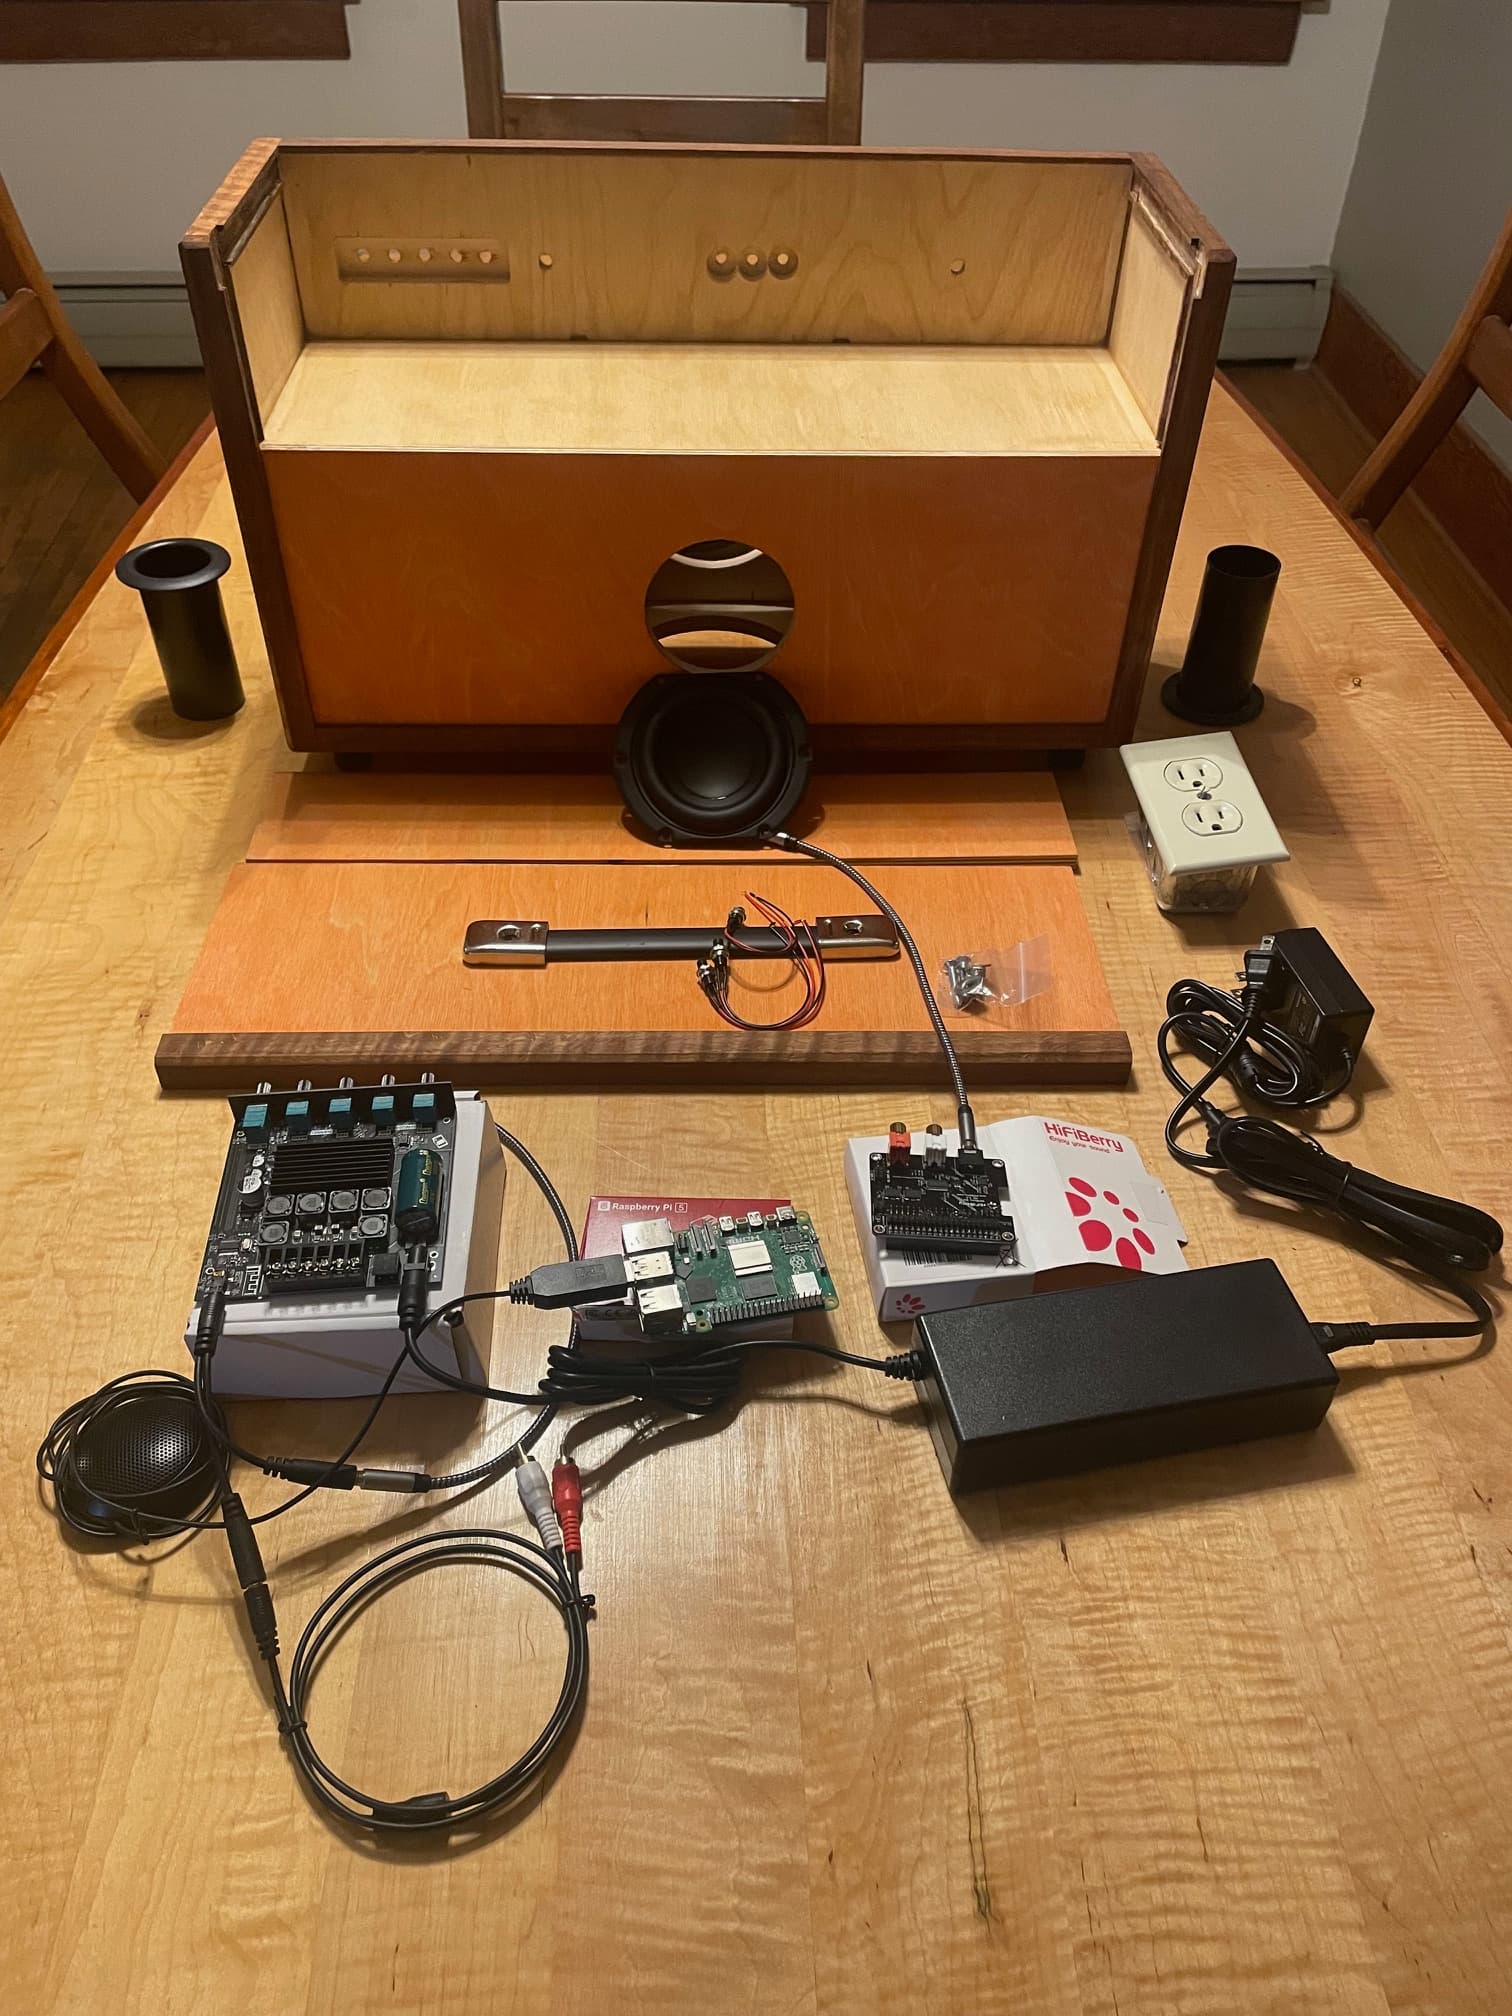
I hope to get Neon/OVOS running on it natively.
Hope this is informative and will post a couple more pix when it is finished …